Quickstart Guide
This guide walks through the minimum configuration required to register your first sample in SENAITE and move it through every workflow state to publication.
Prerequisites
SENAITE ships without any pre-configured data. Before you can register a sample, you need to set up a few items. All configuration is done through the LIMS Setup screen.
Navigate to LIMS Setup by clicking the gear icon in the upper-right corner of
any screen. You can also press Ctrl+Space to open the Spotlight Search and
type the name of the setup item you want to reach.
Step 1: Add a Lab Department
Click Lab Departments in the setup screen, then click Add.
Enter the following values and click Save:
| Field | Value |
|---|---|
| Title | Chemistry |
| Description | Analytical chemistry department |
Step 2: Add an Analysis Category
Analysis categories group related analyses together, independent of department.
Click Analysis Categories in the setup screen, then click Add.
Enter the following values and click Save:
| Field | Value |
|---|---|
| Title | Water Chemistry |
| Description | Chemical water analyses |
| Department | Chemistry |
Step 3: Add Analysis Services
Analysis services represent the test catalog — the individual measurements your laboratory performs. Each service has a keyword that must be unique across the system.
Click Analysis Services in the setup screen, then click Add.
Create the following three services one by one:
Calcium
| Field | Value |
|---|---|
| Title | Calcium |
| Unit | mg/L |
| Analysis Keyword | Ca |
| Point of Capture | Lab |
| Analysis Category | Water Chemistry |
| Department | Chemistry |
Magnesium — use keyword Mg
Total Hardness — use keyword THCaCO3
You can duplicate an existing analysis service from the listing view by selecting its checkbox and clicking Duplicate.
The analysis keyword is used in calculations, instrument result imports, and can be shown in result reports. CAS numbers or LOINC codes are good choices for standardized labs.
Step 4: Add a Sample Type
Sample types control how samples are classified and how their IDs are generated.
Click Sample Types in the setup screen, then click Add.
Enter the following values and click Save:
| Field | Value |
|---|---|
| Title | Water |
| Prefix | H2O |
| Minimum Volume | 100 ml |
The prefix appears in the generated sample ID. Keep it short and meaningful.
Step 5: Add a Client
All samples in SENAITE belong to a client. For non-contract laboratories, create a single client that represents your own organization.
Navigate to Clients using the left-hand sidebar, then click Add.
Enter the following values and click Save:
| Field | Value |
|---|---|
| Name | Happy Hills |
| Client ID | HH |
Step 6: Add a Client Contact
Each client needs at least one contact person. The contact is required when creating a sample and is the recipient of published result reports.
Open the newly created Happy Hills client and click the Contacts tab,
then click Add and fill in the contact details, then click Save.
The contact's email address is used when sending result reports. Ensure a mail server is configured in the LIMS setup if you intend to send emails.
Registering a Sample
Open the Happy Hills client and click the Samples tab. Select 1 from
the count selector next to the Add button and click Add.
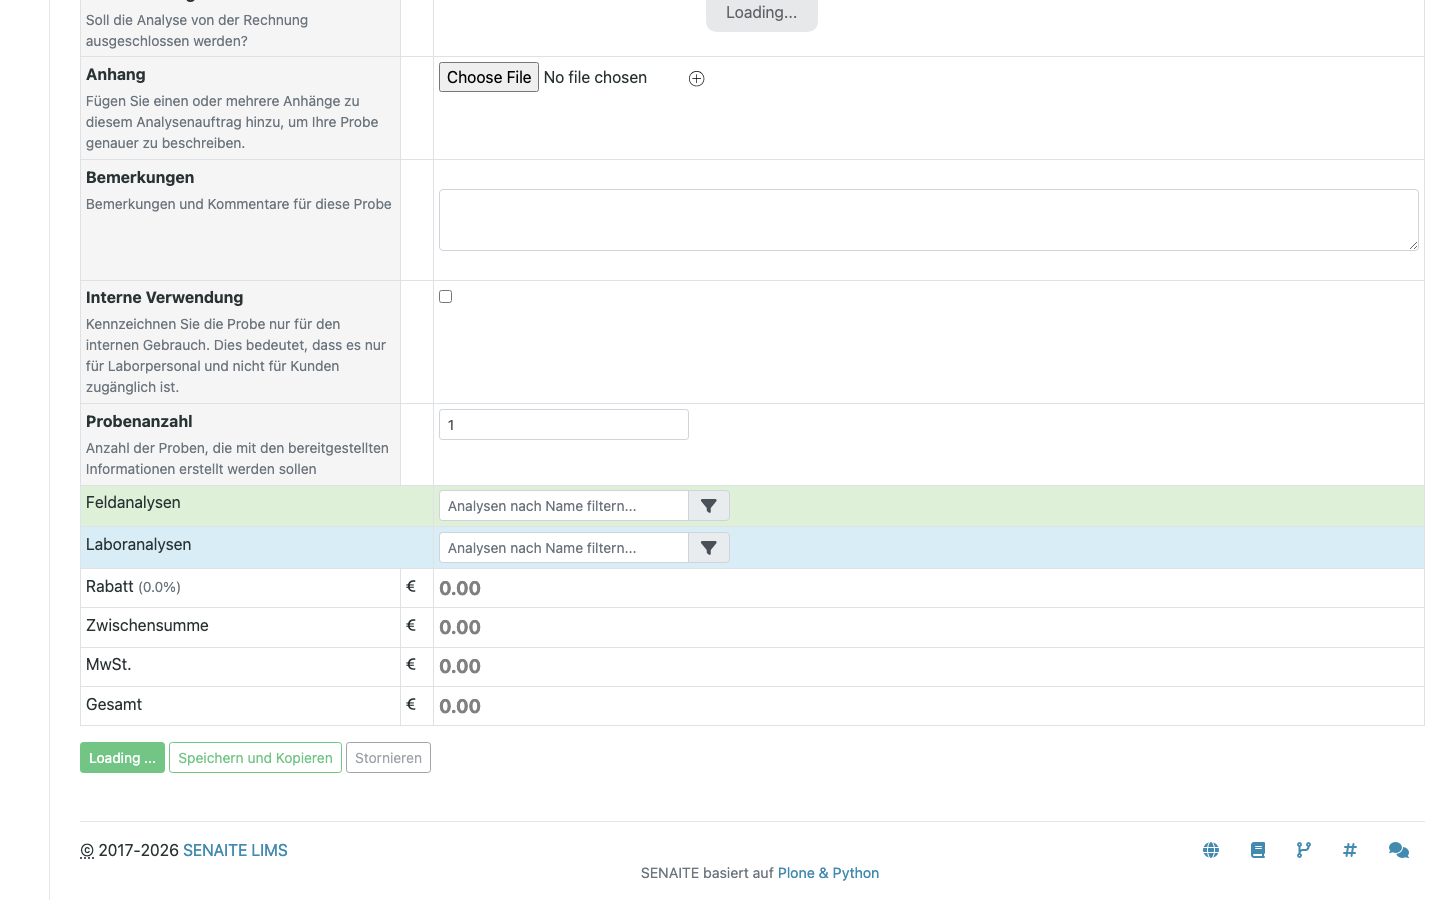
The count selector lets you register multiple samples in a single step. Each column in the form represents one sample. Set the count before clicking Add — changing it afterwards reloads the form and clears entered values.
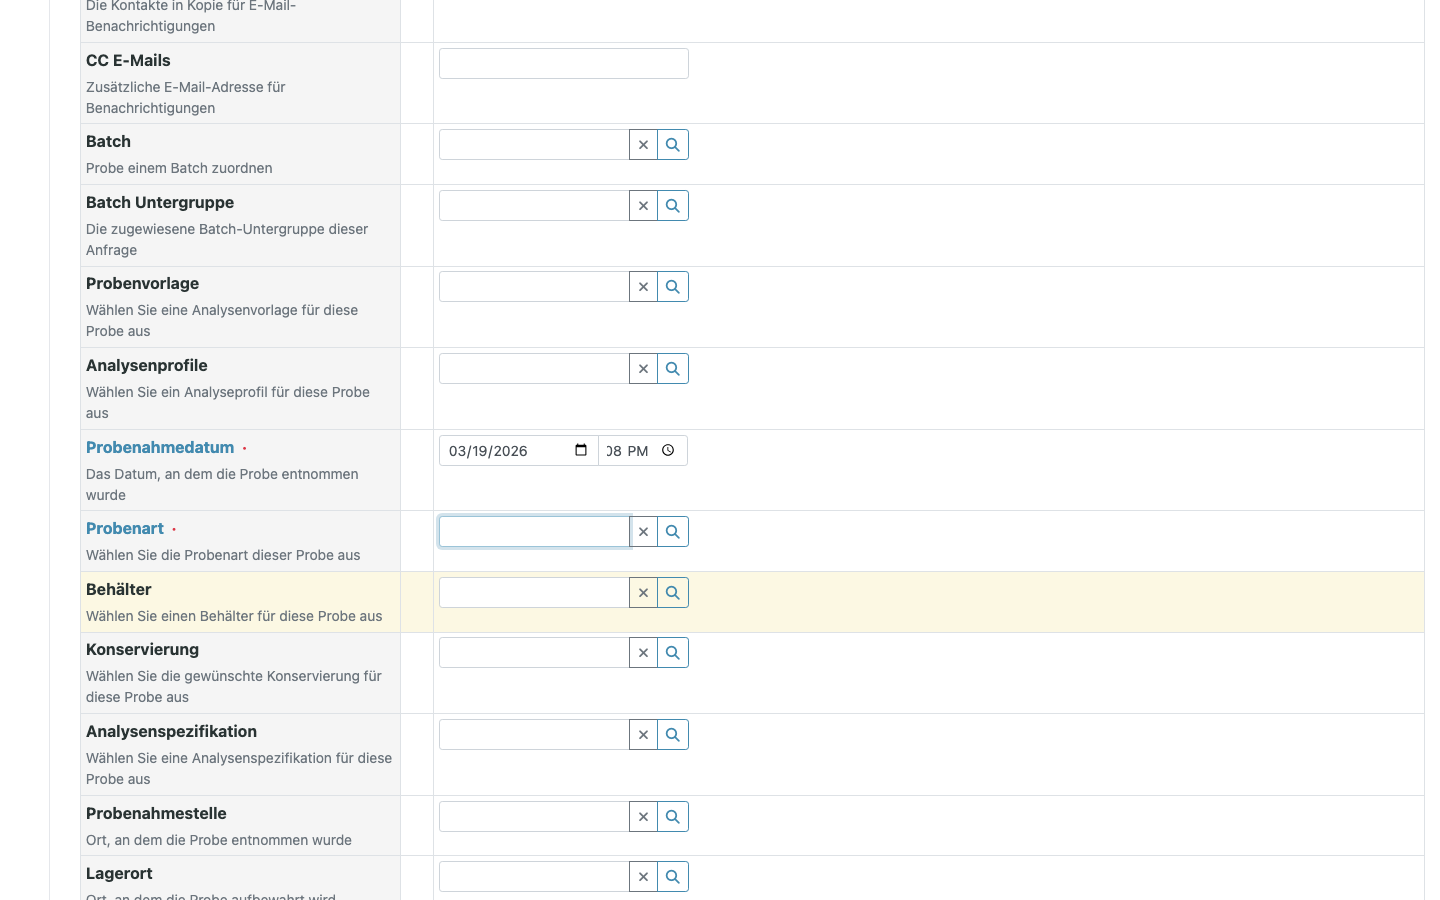
Click Manage Form Fields in the upper-left corner of the form to show, hide, and reorder the available fields.
Fill in the following fields:
| Field | Value |
|---|---|
| Contact | The contact you created in Step 6 |
| Date Sampled | Click now in the date picker |
| Sample Type | Water |
| Lab Analyses | Calcium, Magnesium, Total Hardness |
Click Save.
The sample is created and appears in the listing with status Sample Due.
The sample ID is generated automatically using the sample type prefix — for
example H2O-0001.
Sample Due means the physical sample has not yet arrived at the laboratory. This is useful when samples are registered in advance and labeled before collection.
Sample Workflow
Receive the Sample
When the physical sample arrives, a Lab Clerk receives it to confirm its condition and suitability for analysis.
Select the sample in the listing and click Receive.
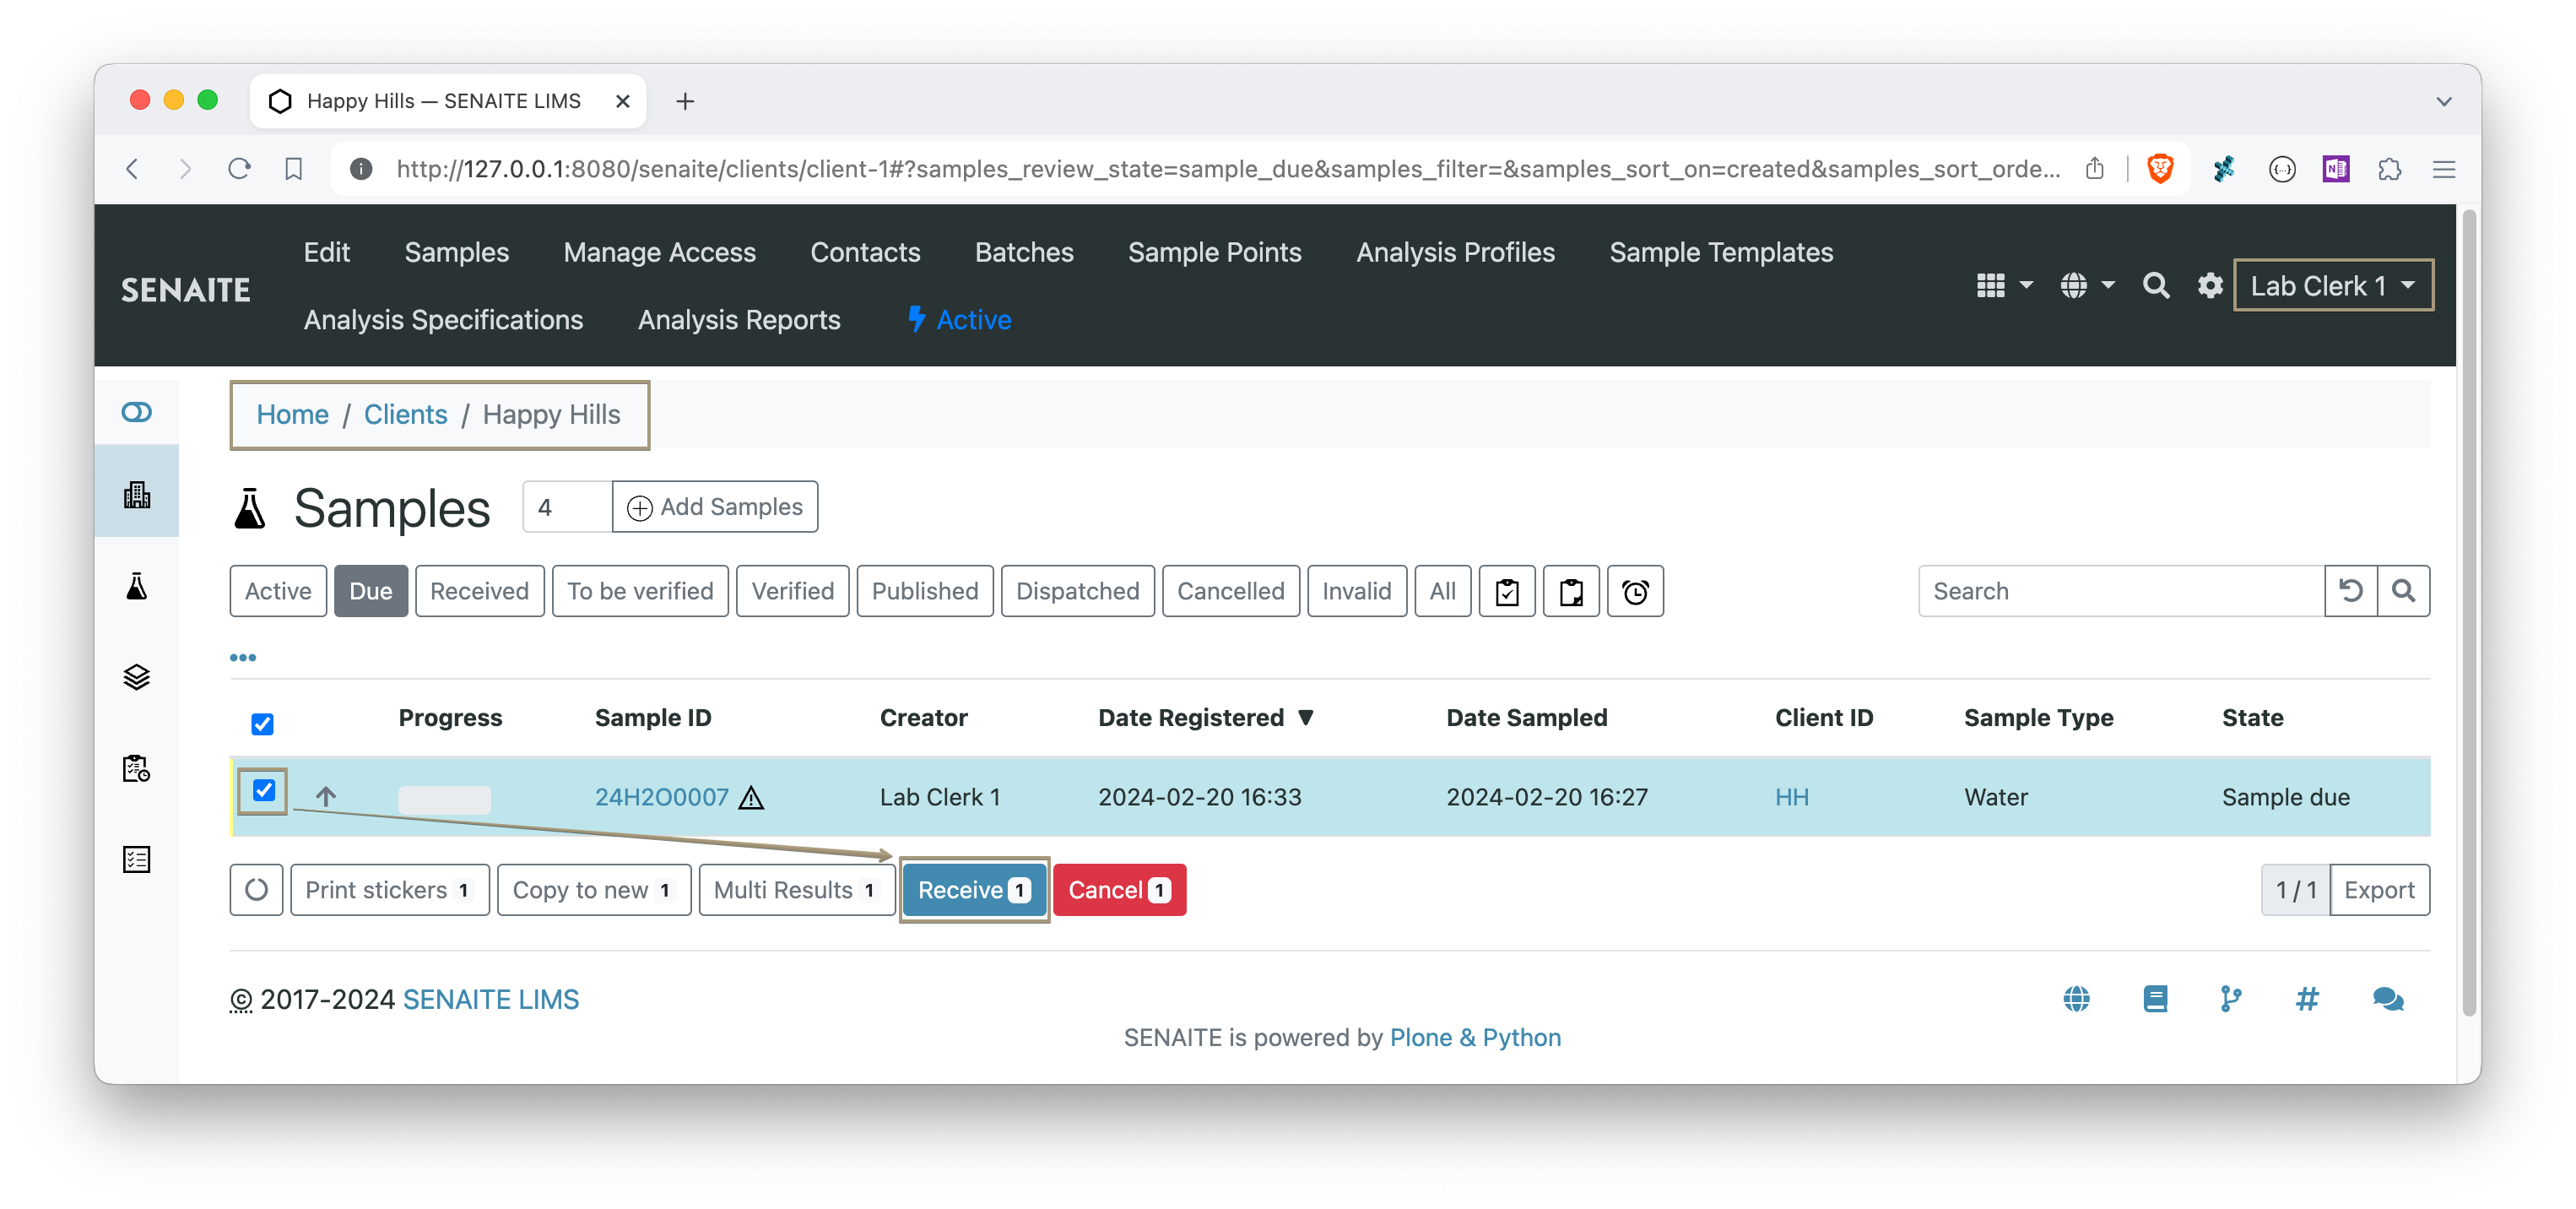
The sample transitions to Received status.

For in-house laboratories that collect and analyze their own samples, you can enable Auto-Receive Samples in the LIMS setup to skip this step.
Submit Results
Open the received sample by clicking its ID.
Enter the result values in the analyses table and click Submit.
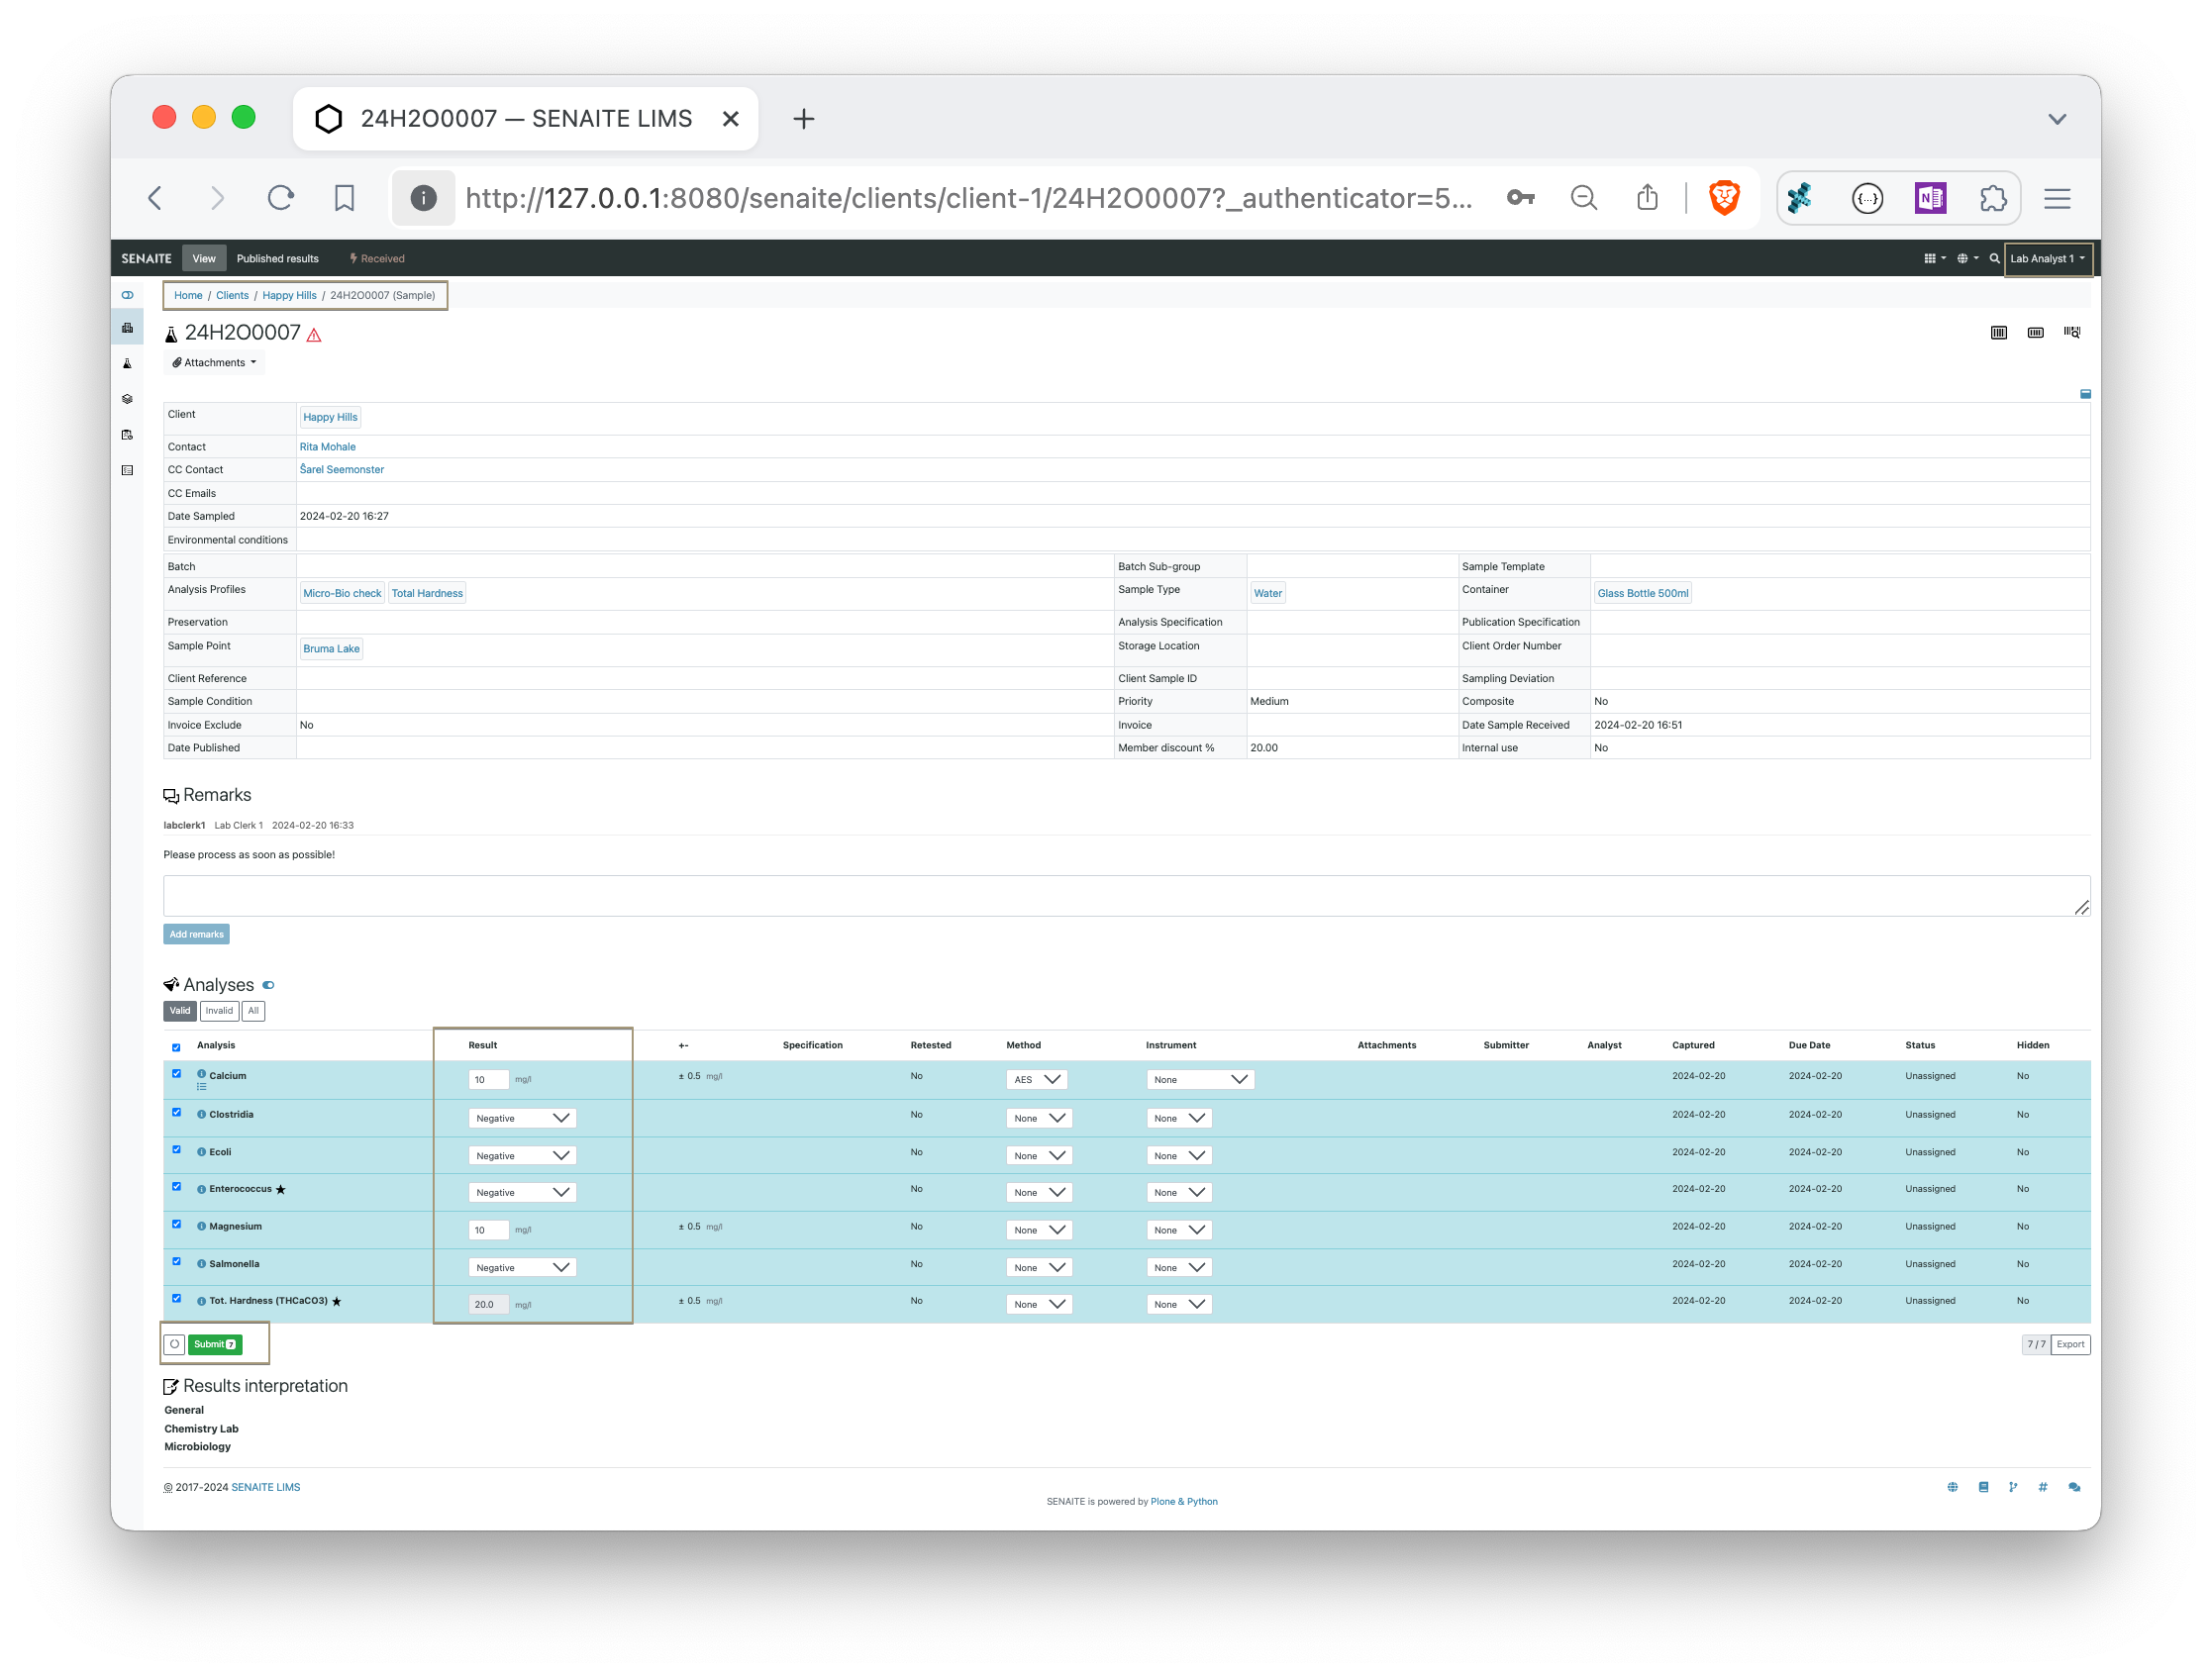
Clicking Save before Submit stores the results without submitting them for review. The system runs server-side recalculations and out-of-range checks on save.
After submitting all results, the sample transitions to To be verified status.

Verify Results
Verification is performed by a Lab Manager or a user with the Verifier role. It is the final quality check before results are released to the client.
Open the sample and click Verify.
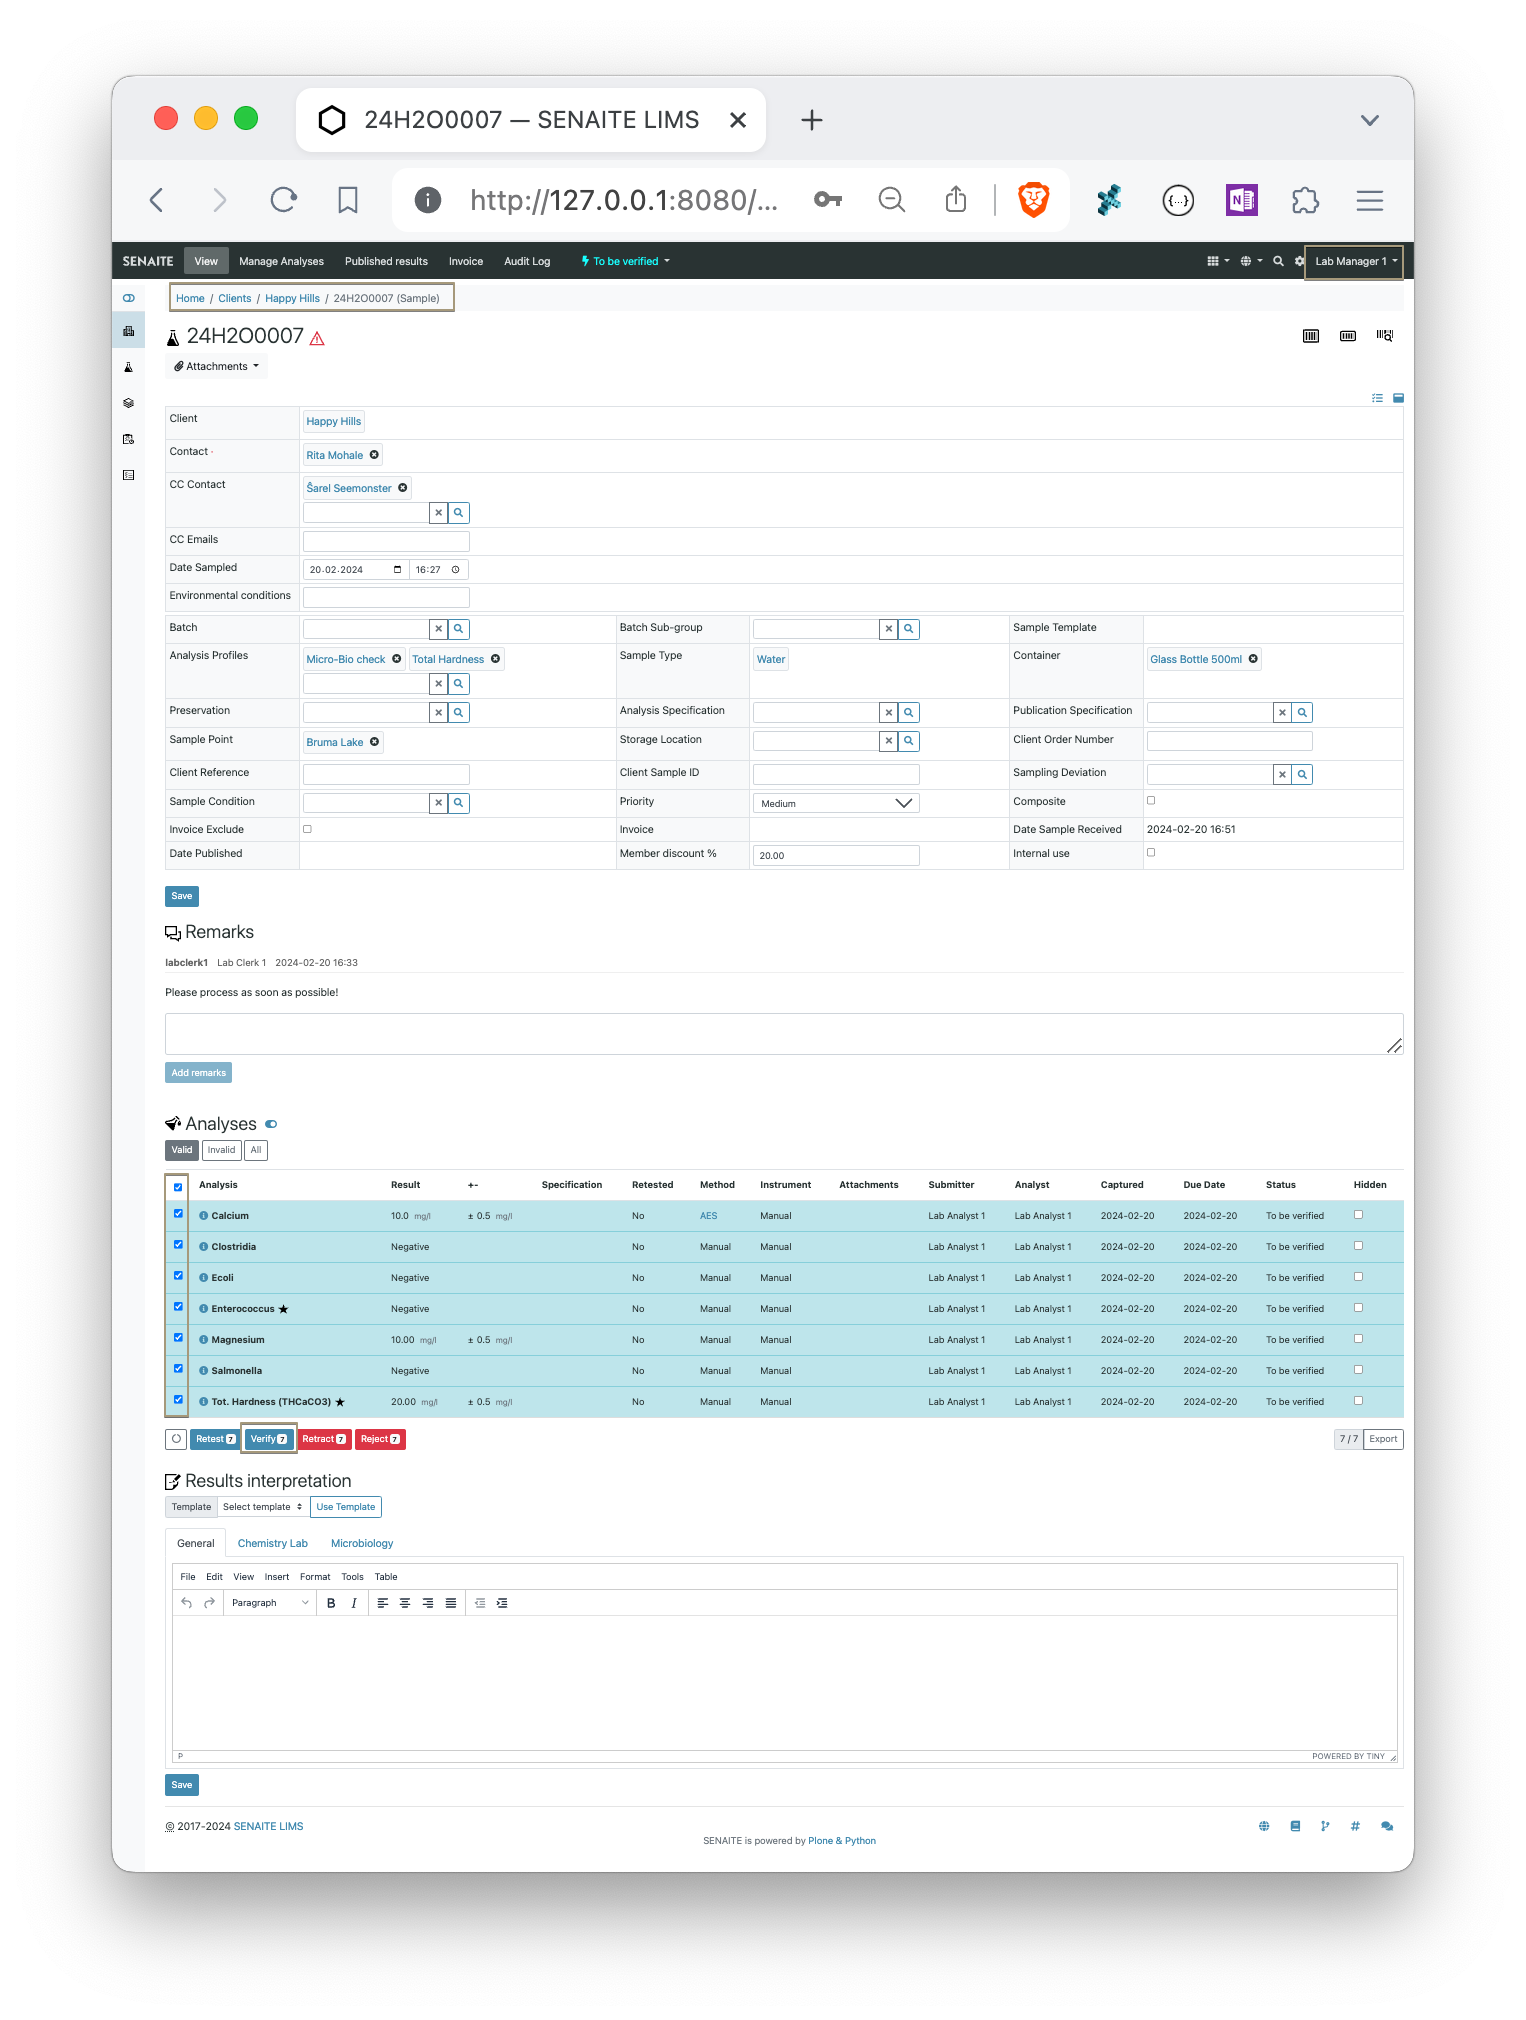
Once verified, analyses cannot be reversed unless the entire sample is invalidated. Client contacts with system access can view verified results before publication.
The sample transitions to Verified status.

Publish Results
Select the verified sample in the listing and click Publish. This opens the SENAITE Impress report preview with the default report template.
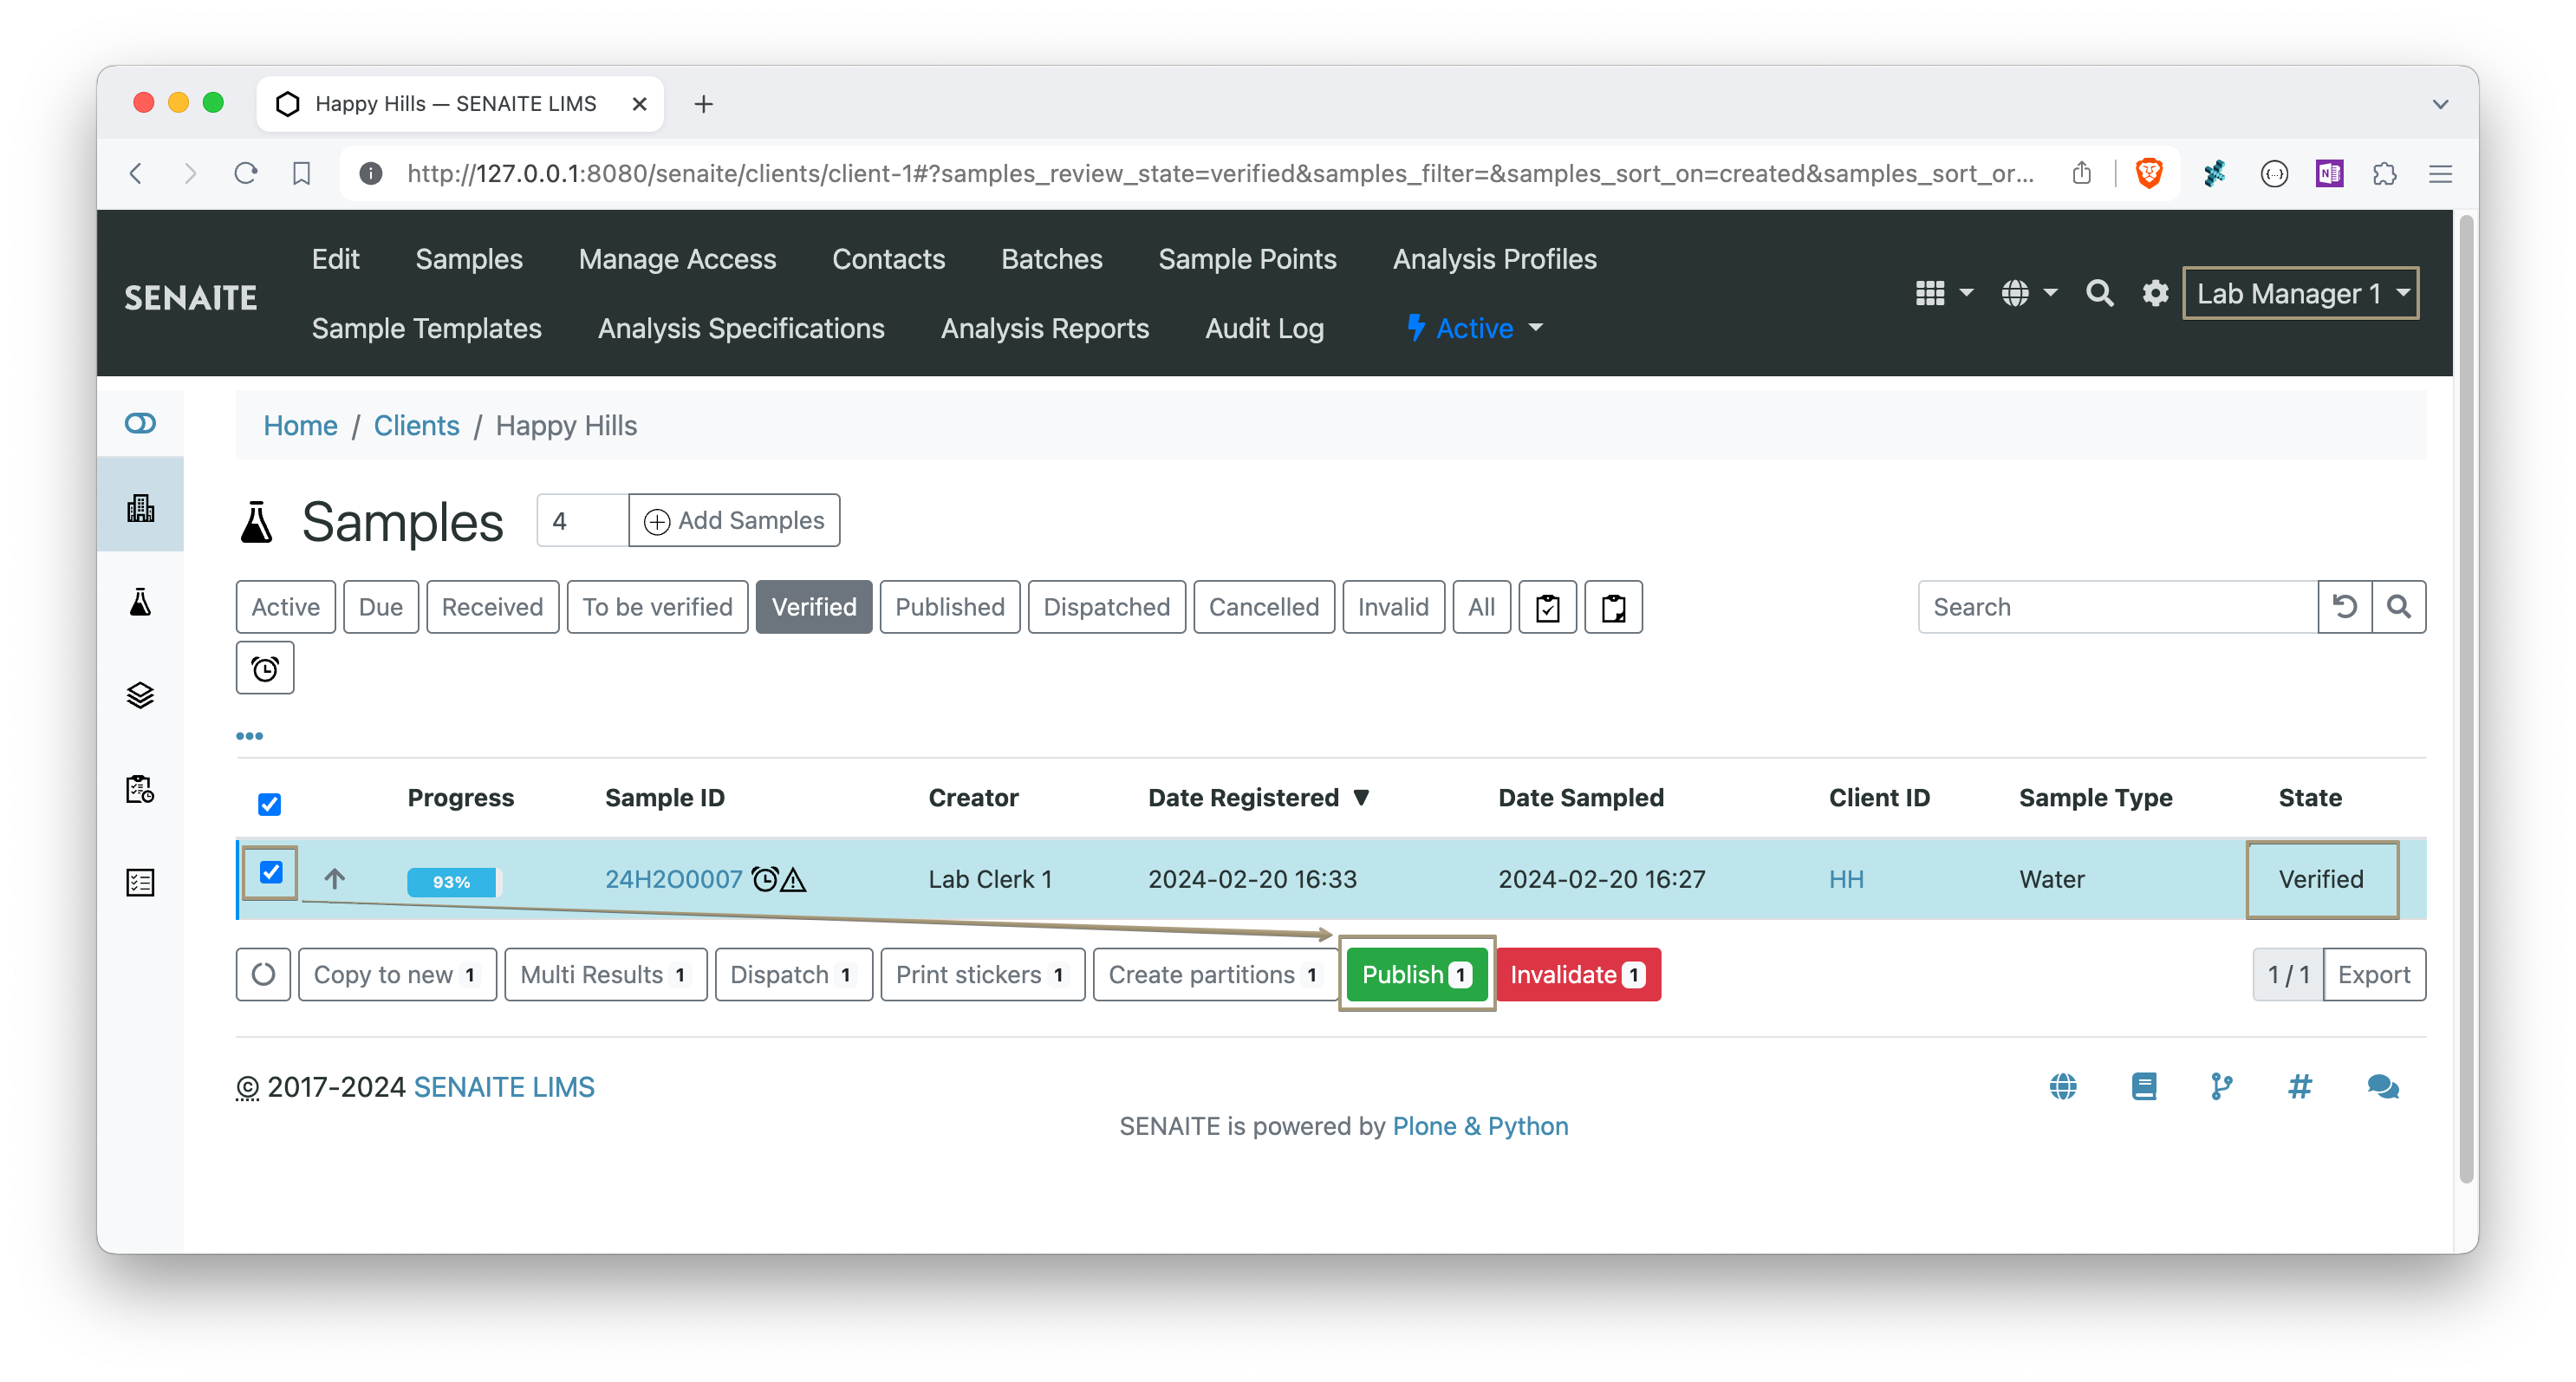
The standard templates are provided as examples. Contact your service provider to customize report templates to fit your laboratory's requirements.
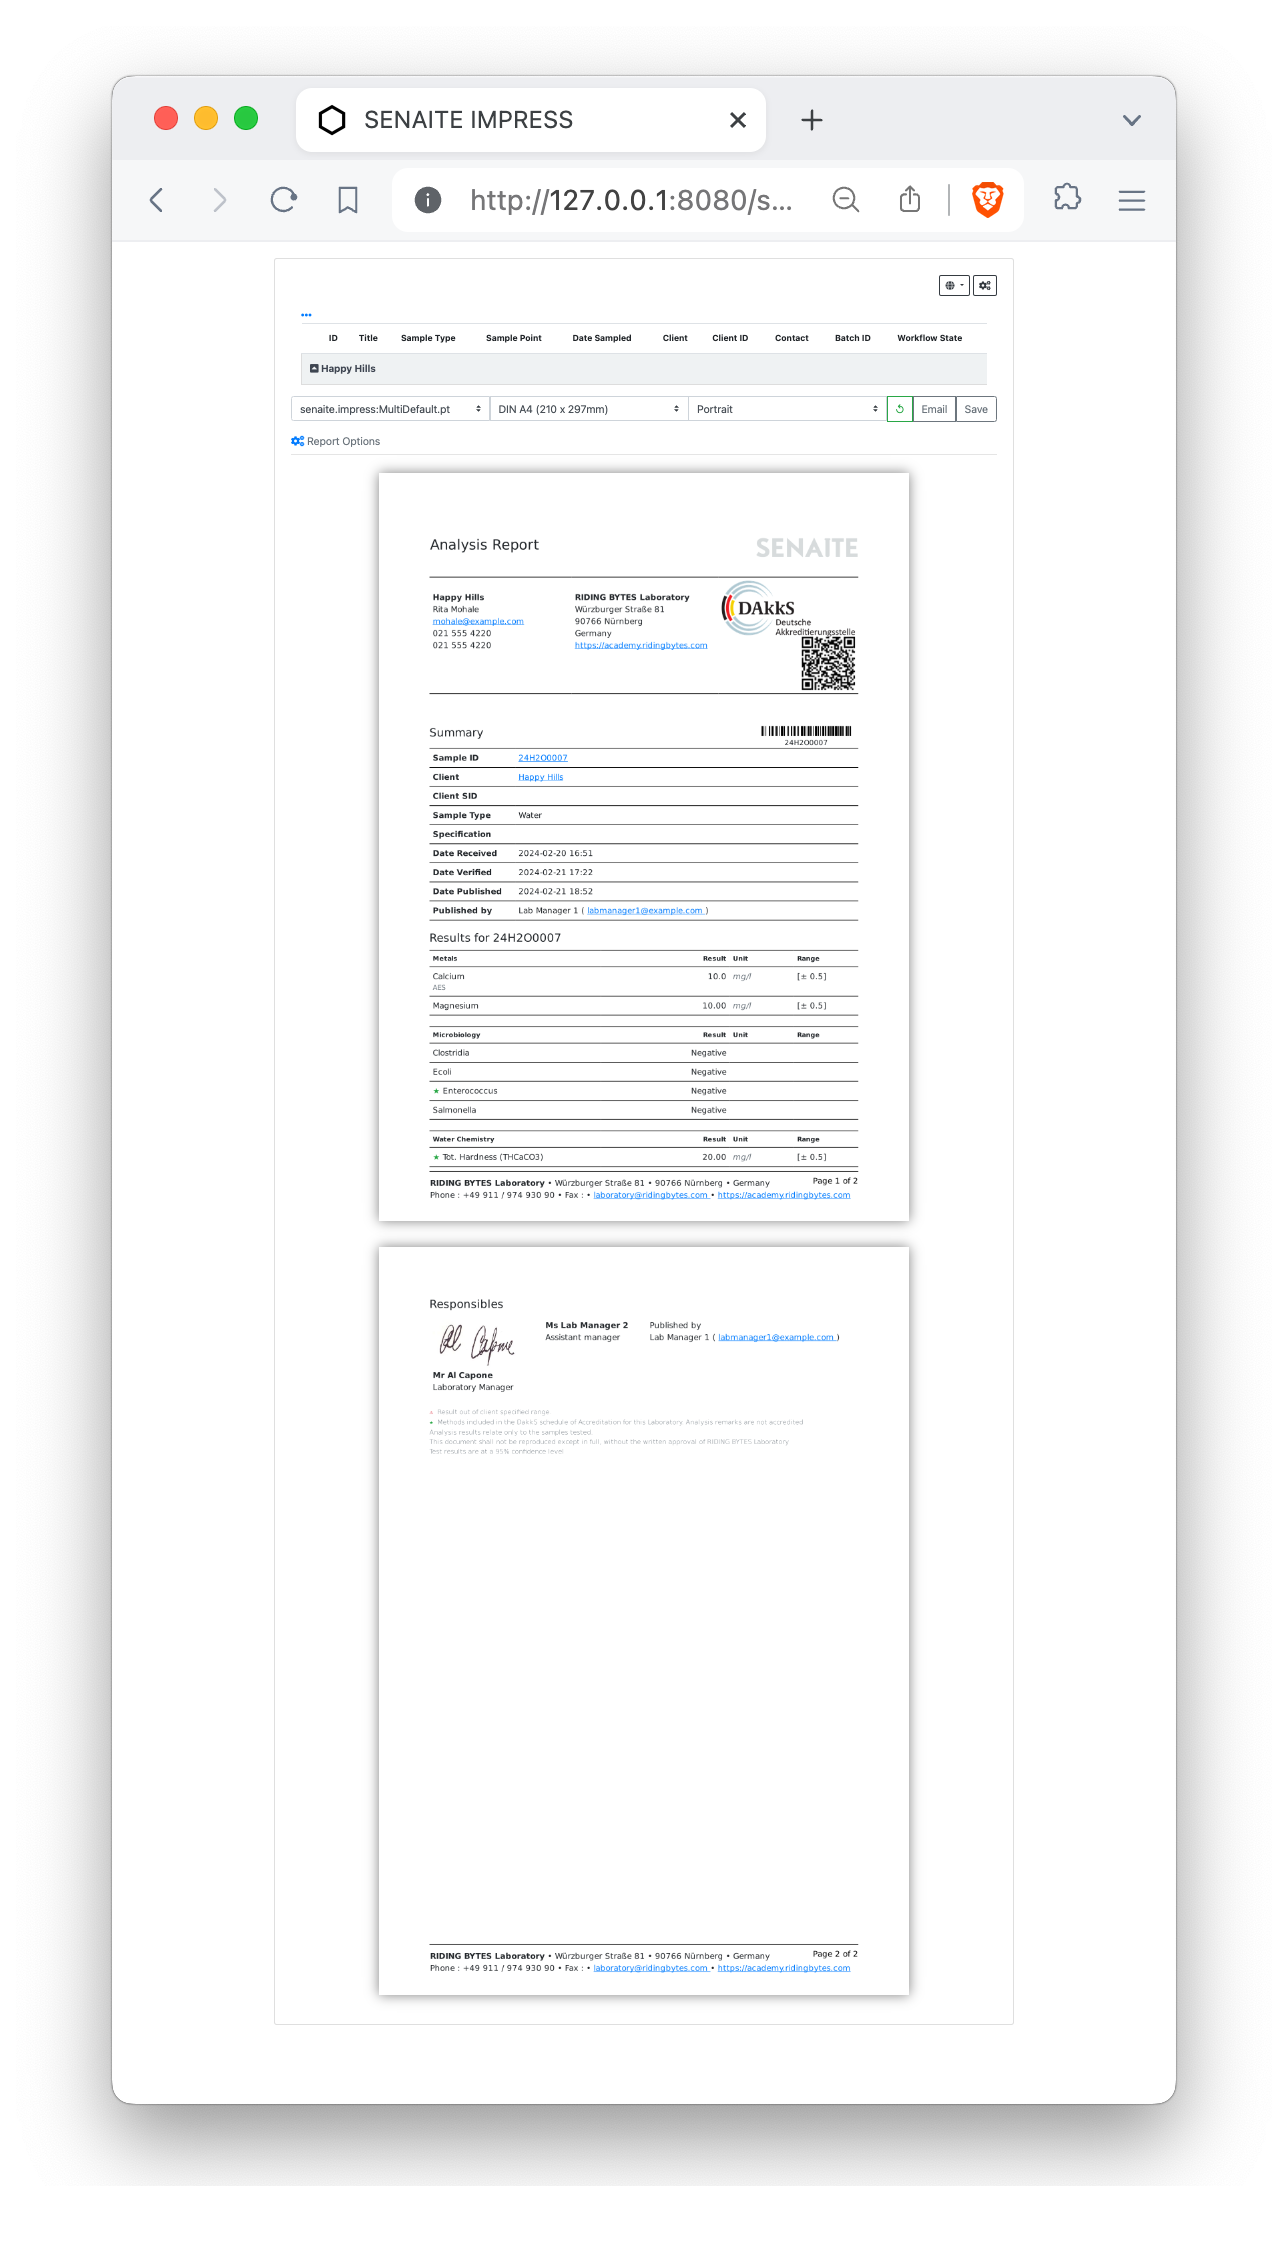
Click Save to generate the results report PDF and store it in the system, or Email to generate the report and open the email composition form.
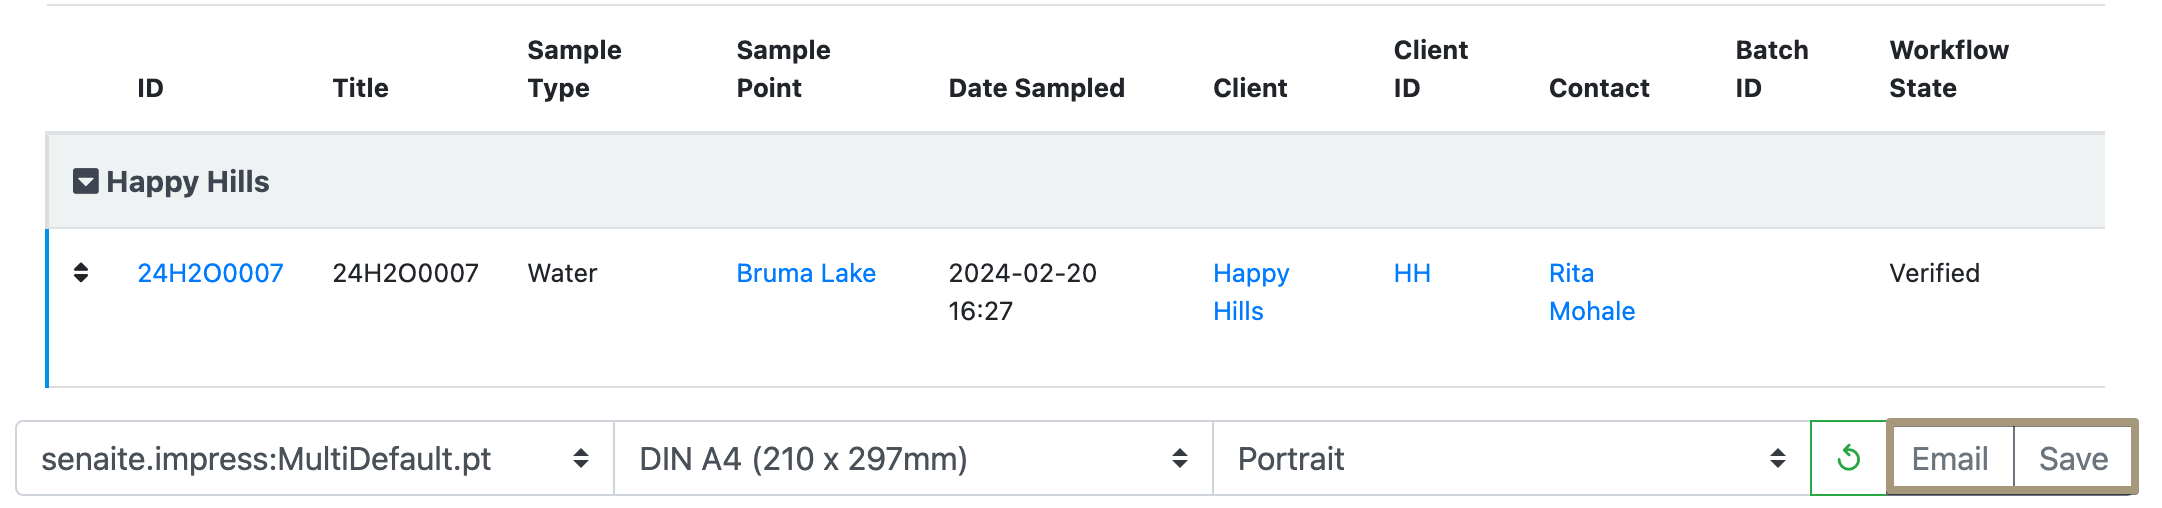
To publish the sample without sending an email, click Publish in the Impress toolbar.
Generating the PDF via Save does not automatically publish the sample. The sample transitions to Published status only after clicking Publish or sending the report via Email.
The sample is now in Published status — the final state in the basic workflow.
Next Steps
With the basic workflow complete, you can explore:
- Analysis Profiles — pre-defined sets of analyses to speed up sample registration.
- Analysis Templates — profiles combined with sample type and other default values.
- Worksheets — plan and assign analyses to analysts in batch.
- Sample Partitions — split a received sample into aliquots for separate analysis.
- Specifications — define valid result ranges and trigger out-of-range warnings.
Refer to the community forum for further guidance or to ask questions.